
TorchVision, a PyTorch computer vision package, has a simple API for image pre-processing in its torchvision.transforms module. The module contains a set of common, composable image transforms and gives you an easy way to write new custom transforms. As you would expect, these custom transforms can be included in your pre-processing pipeline like any other transform from the module.
Let’s start with a common use case, preparing PIL images for one of the pre-trained TorchVision image classifiers:
import io

import requests
import torchvision.transforms as T

from PIL import Image

resp = requests.get('https://sparrow.dev/assets/img/cat.jpg')
img = Image.open(io.BytesIO(resp.content))

preprocess = T.Compose([
   T.Resize(256),
   T.CenterCrop(224),
   T.ToTensor(),
   T.Normalize(
       mean=[0.485, 0.456, 0.406],
       std=[0.229, 0.224, 0.225]
   )
])

x = preprocess(img)
x.shape

# Expected result
# torch.Size([3, 224, 224])
Here, we apply the following in order:
- Resize a PIL image to
(<height>, 256), where<height>is the value that maintains the aspect ratio of the input image. - Crop the
(224, 224)center pixels. - Convert the PIL image to a PyTorch tensor (which also moves the channel dimension to the beginning).
- Normalize the image by subtracting a known ImageNet mean and standard deviation.
Let’s go a notch deeper to understand exactly how these transforms work.
Transforms
TorchVision transforms are extremely flexible – there are just a few rules. In order to be composable, transforms need to be callables. That means you can actually just use lambdas if you want:
times_2_plus_1 = T.Compose([
    lambda x: x * 2,
    lambda x: x + 1,
])

x.mean(), times_2_plus_1(x).mean()

# Expected result
# (tensor(1.2491), tensor(3.4982))
But often, you’ll want to use callable classes because they give you a nice way to parameterize the transform at initialization. For example, if you know you want to resize images to have height of 256 you can instantiate the T.Resize transform with a 256 as input to the constructor:
resize_callable = T.Resize(256)Any PIL image passed to resize_callable() will now get resized to (<height>, 256):
resize_callable(img).size

# Expected result
# (385, 256)
This behavior is important because you will typically want TorchVision or PyTorch to be responsible for calling the transform on an input. We actually saw this in the first example: the component transforms (Resize, CenterCrop, ToTensor, and Normalize) were chained and called inside the Compose transform. And the calling code would not have knowledge of things like the size of the output image you want or the mean and standard deviation for normalization.
Interestingly, there is no Transform base class. Some transforms have no parent class at all and some inherit from torch.nn.Module. This means that if you’re writing a transform class, the constructor can do whatever you want. The only requirement is that there must be a __call__() method to ensure the instantiated object is callable. Note: when transforms override the torch.nn.Module class, they will typically define the forward() method and then the base class takes care of __call__().
Additionally, there are no real constraints on the callable’s inputs or outputs. A few examples:
T.Resize: PIL image in, PIL image out.T.ToTensor: PIL image in, PyTorch tensor out.T.Normalize: PyTorch tensor in, PyTorch tensor out.
NumPy arrays may also be a good choice sometimes.
Ok. Now that we know a little about what transforms are, let’s look at an example that TorchVision gives us out of the box.
Example Transform: Compose
The T.Compose transform takes a list of other transforms in the constructor and applies them sequentially to the input. We can take a look at the __init__() and __call__() methods from a recent commit hash to see how this works:
class Compose:
    def __init__(self, transforms):
        self.transforms = transforms

    def __call__(self, img):
        for t in self.transforms:
            img = t(img)
        return img
Very simple! You can pass the T.Compose constructor a list (or any other in-memory sequence) of callables and it will dutifully apply them to any input one at a time. And notice that the input img can be any type you want. In the first example, the input was PIL and the output was a PyTorch tensor. In the second example, the input and output were both tensors. T.Compose doesn’t care!
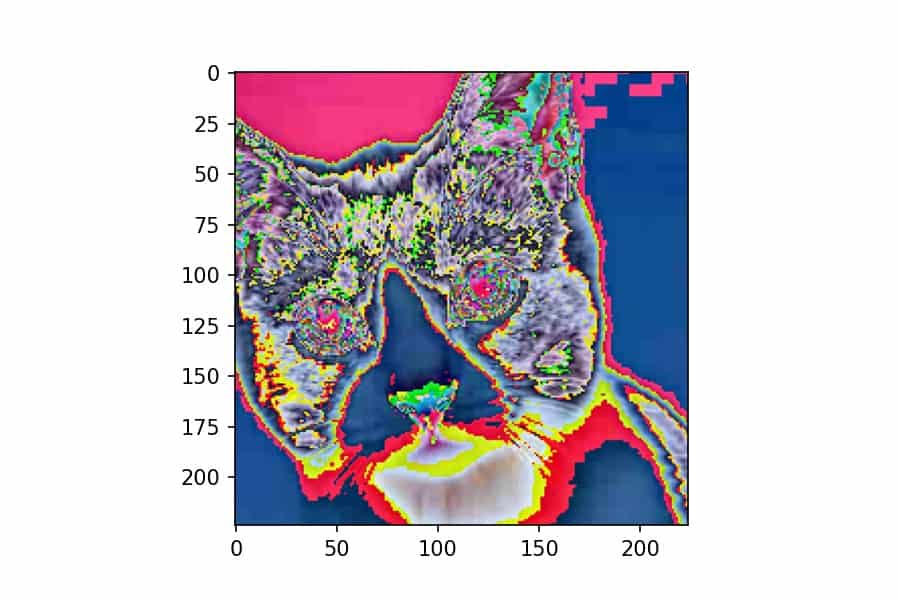
Let’s instantiate a new T.Compose transform that will let us visualize PyTorch tensors. Remember, we took a PIL image and generated a PyTorch tensor that’s ready for inference in a TorchVision classifier. Let’s take a PyTorch tensor from that transformation and convert it into an RGB NumPy array that we can plot with Matplotlib:
%matplotlib inline
import matplotlib.pyplot as plt
import numpy as np

reverse_preprocess = T.Compose([
    T.ToPILImage(),
    np.array,
])

plt.imshow(reverse_preprocess(x));
The T.ToPILImage transform converts the PyTorch tensor to a PIL image with the channel dimension at the end and scales the pixel values up to int8. Then, since we can pass any callable into T.Compose, we pass in the np.array() constructor to convert the PIL image to NumPy. Not too bad!
Functional Transforms
As we’ve now seen, not all TorchVision transforms are callable classes. In fact, TorchVision comes with a bunch of nice functional transforms that you’re free to use. If you look at the torchvision.transforms code, you’ll see that almost all of the real work is being passed off to functional transforms.
For example, here’s the functional version of the resize logic we’ve already seen:
import torchvision.transforms.functional as F

F.resize(img, 256).size

# Expected result
# (385, 256)
It does the same work, but you have to pass additional arguments in when you call it. My advice: use functional transforms for writing custom transform classes, but in your pre-processing logic, use callable classes or single-argument functions that you can compose.
At this point, we know enough about TorchVision transforms to write one of our own.
Custom Transforms
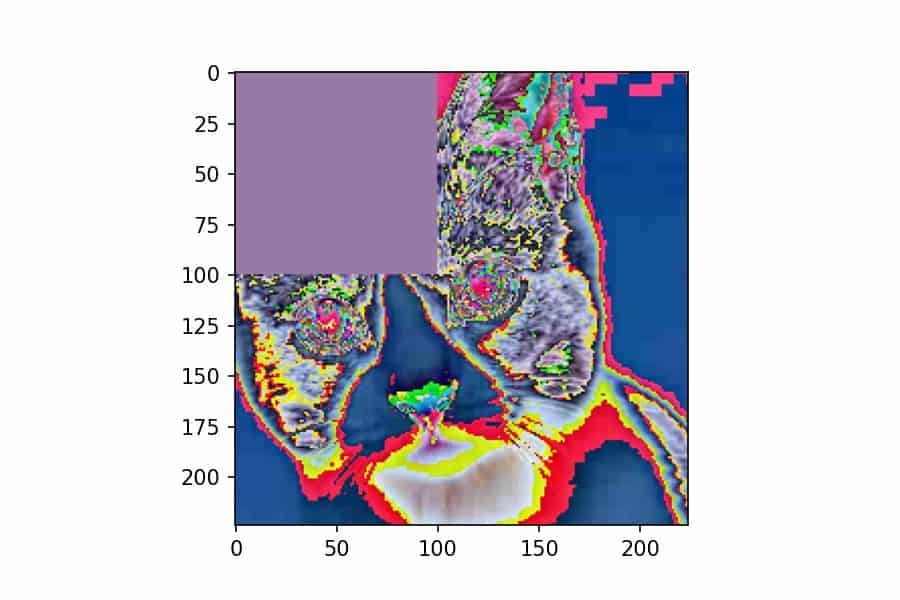
Let’s write a custom transform that erases the top left corner of an image with the color of a randomly selected pixel. We’ll use the F.erase() function and we’ll allow the caller to specify what how many pixels they want to erase in both directions:
import torch

class TopLeftCornerErase:
    def __init__(self, n_pixels: int):
        self.n_pixels = n_pixels

    def __call__(self, img: torch.Tensor) -> torch.Tensor:
        all_pixels = img.reshape(3, -1).transpose(1, 0)
        idx = torch.randint(len(all_pixels), (1,))[0]
        random_pixel = all_pixels[idx][:, None, None]
        return F.erase(img, 0, 0, self.n_pixels, self.n_pixels, random_pixel)
In the constructor, all we do is take the number of pixels as a parameter from the caller. The magic happens in the __call__() method:
- Create a reshaped view of the image tensor as a
(n_pixels, 3)tensor - Randomly select a pixel index using
torch.randint() - Add two dummy dimensions to the tensor. This is because
F.erase()and to the image, which has these two dimensions. - Call and return
F.erase(), which takes five arguments: the tensor, theicoordinate to start at, thejcoordinate to start at, theheightof the box to erase, thewidthof the box to erase and the random pixel.
We can apply this custom transform just like any other transform. Let’s use T.Compose to both apply this erase transform and then convert it to NumPy for plotting:
torch.manual_seed(1)

erase = T.Compose([
    TopLeftCornerErase(100),
    reverse_preprocess,
])

plt.imshow(erase(x));
We’ve seen this type of transform composition multiple times now. One thing that is important to point out is that you need to call torch.manual_seed() if you want a deterministic (and therefore reproducible) result for any TorchVision transform that has random behavior in it. This is new as of version 0.8.0.
And that’s about all there is to know about TorchVision transforms! They’re lightweight and flexible, but using them will make your image preprocessing code much easier to reason about.